WFH Back Pain? Here’s 5 Exercises to Improve Your Postural Alignment
Seven months and the WFH hunch has started to set in. Humans weren’t meant to spend this much time stuck on the sofa, clambering over to the desk now and again, stumbling into the kitchen for cereal to make up for the lack of a morning commute.
“Optimal posture isn’t static. It changes throughout our day as we move about. Or at least, it should,” says personal trainer and physiotherapist Tim Blakey, who comes from the school of thought that good posture and quality of movement are the cornerstones to physical accomplishment. “Modern-day living has us occupying static positions for far too long. It’s not so much that we lack correct posture; we just lack enough regular movement which would otherwise hold us in check.”
Good posture is the foundation by which strength, flexibility and balance can grow. If you’re a regular gym-goer then proper posture can also reduce stress on your muscles while you train and reduce pain thereafter. It will reduce back pain, can lessen your risk of tension headaches, and help boost your energy levels.
So, to help ensure you keep proper posture through these weirdly static times, we’ve called on Blakey and his expertise for the five best exercises in correcting and improving your postural alignment. For video demonstrations of each exercise, refer to Blakey’s Instagram video below.
Mobility Sequence
Though technically not one exercise, this full-body mobility sequence emphasises opening up the hips and legs. Follow the sequence in full via videos one and two in the gallery.
You should aim to do anywhere from 4-10 reps of each movement before moving on to the next. It starts with sun salutations – a yoga move – alternating between tucking the shoulder into the groin of the front leg, then moving to a hamstring stretch by gliding back and forth from the front leg, keeping the chest glued to the front thigh.
Lastly, move the front leg out to the side (knee straight), and drop the chest low to the floor as you rock the hips back to the heels with each rep, repeating on each side.
I like to finish with a functional deep squat, which is essential for optimal biomechanics and mobility. Really, we should all spend a few minutes a day in this position – we stopped doing it with the invention of the modern toilet!

Wall/Floor Angels
This exercise is the re-posturing holy grail. Standing with your back to the wall using a deep posterior tilt of the pelvis, neck retracted and chin tucked, keep your arms straight as you run them up the wall as high as possible with palms facing out.
The aim here is to always keep the back of the arms in contact with the wall, and as much of your back attached to the wall. If you find this too difficult, perform them lying down length-ways on a foam roller (demonstrated in video 4 of the gallery). The raised roller and addition of gravity allows the chest to open up and the arms to glide back further.
Start with 2 sets of 10, but do them as often as you like throughout the day.
PIC

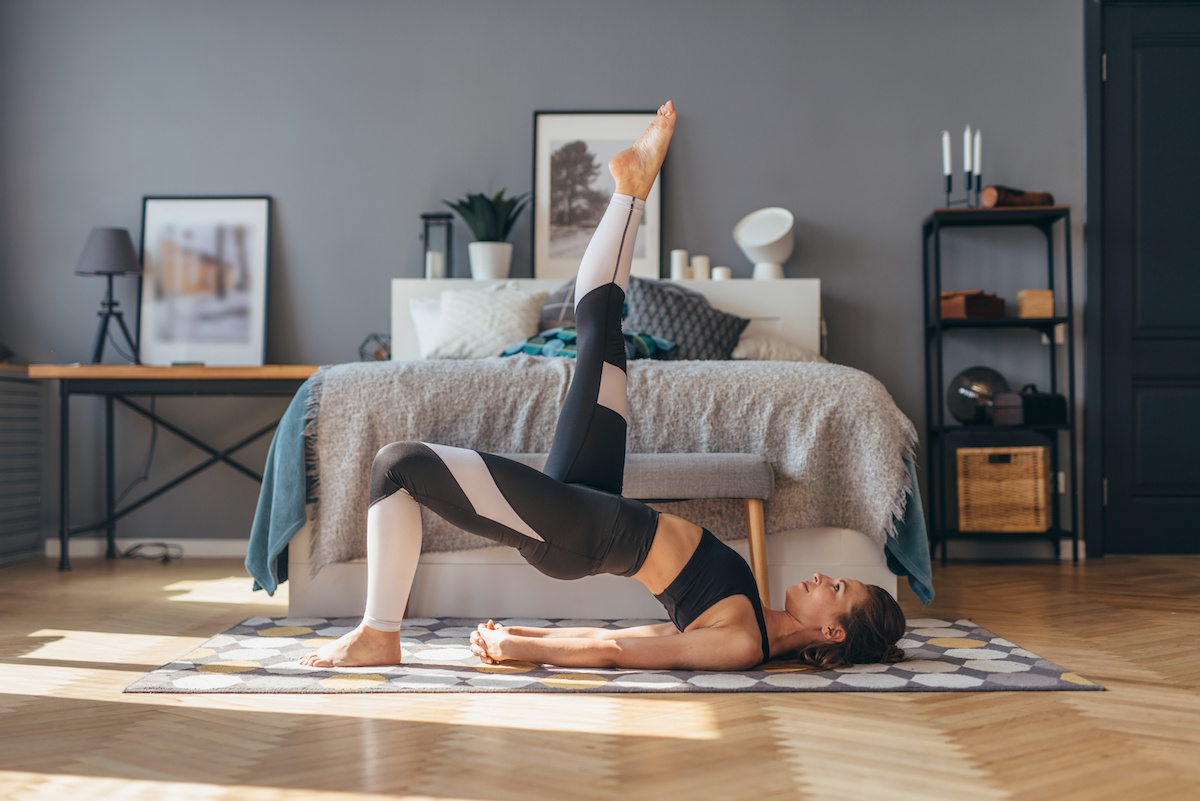
Single-Leg Glute Bridge with High Knee Tuck
Our glutes are crucial for a strong foundation and alignment, but our day-to-day living can cause them to get lazy. This exercise will fire them back to life. The tucked knee helps to neutralise the pelvis due to commonly tight hip flexors and any excessive lordosis curve in the lower back.
- Bend your active leg and plant it on a small step for better activation
- Your buttocks should be about one foot’s distance from your planted foot (any further and you’ll feel it more in your hamstring than your glutes)
- Peel the pelvis, sacrum and spine sequentially off the floor as you squeeze the active glute as tight as possible
- Lower down slowly and sequentially with your spine and hips
- Perform 10 reps, rest, then repeat for 10.

Kettlebell Windmills
Now to loosen up and activate the posterior chain – which, FYI, is basically every part of your body that you can’t see when facing a mirror. This exercise has a little mid-back mobility thrown in for good measure and will activate your deep core to help you to stand nice and tall.
With feet at hip-width holding a kettlebell in one arm, sit back into your hip as you hold the kettlebell directly above your shoulder with a straight arm, like so in video 6. Before you start, here are some tips on form:
-
Sit back into the hip of the weighted side. That leg should feel like it’s holding 90 percent of the weight. It’s ok if the knee of the other leg needs to bend slightly
-
After set-up twist feet 30 degrees away from the weighted side.
- Start very light or unweighted, especially if you don’t feel you have adequate shoulder mobility
- Begin with 2 sets of 10 and slowly increase the weight as your confidence builds

TRX 90/90 Row
Now to balance out our forward-tilting posture and the muscles that rotate the shoulder inward:
- Set up a TRX at mid-strap length and face its anchor point.
- With arms straight out in front of you, walk your feet into the anchor point until you’re in a slight lean.
- Now, keeping the body straight and core tight, pull your body forward, keeping the upper arms parallel to the floor and elbows bent at 90 degrees.
- Rotate the shoulders as you pull. Your forearms should end up in the same vertical alignment as your neck and head.
- Do 10 reps then repeat for a second set
If you want to make it slightly harder, add a W-Y raise at the end of each rep. This technique is demonstrated at the very end of the final video. You can also change your body angle to increase the difficulty as you gain confidence.


